what is image intense?
Image Intense is a divi module which allows background image with text overlays, a foreground image and text effects that appear on hover, a link within the caption text, and a call to action button. That’s just one module with a few simple settings. Plus, it is light-weight and fast, because most effects are handled by server-side PHP and CSS generation.
This is one of the most comprehensive and full-featured modules ever created for both the Divi and Extra themes for the WordPress website development platform. It incorporates features from 3 of the native Divi modules – Image, Text and Button – and then adds many additional UI/UX enhancements.
With it, you have the power to bring “above and beyond” life to your website with one of 22 33 different hover transitions, mix blend modes, buttons, opacity settings and other features. Use it to increase user interaction or drive visitors toward your conversion goal!
How about coupon reveals or beautiful blend modes on hover? Image Intense is as powerful as you are creative. The features and style options with Image Intense are truly compelling. Use it right out of the box or tweak to make it your own. With just a few changes, you’ll have an eye-catching site. With some experience, you’ll have a site that sticks with the user and is truly effective.
Please note that Image Intense is designed to work best with small amounts of text in 1 or 2 column layouts. If using 3 or 4 column layouts, especially using a boxed layout or a smaller fixed width layout, you might run into some styling issues. We’ve tried to accommodate smaller modules as much as possible.
Images
- Hover style – Image Intense comes with
2233 different hover styles. For content examples of each one, visit the hover style demonstration page. - “Image Opacity” in Advanced Settings – Sliders allow for normal state (not hovered) foreground image opacity, and also opacity on hover. This gives you the ability to create Superfly image transition hover effects. Note that a long press on mobile is what triggers what is a hover on desktop.
- Mix Blend Mode – Truly intense ways to have your background and foreground blend using Superfly CSS blend options. No need for plugins or JavaScript. Be sure to check out Codrops on how and why this works.
- Background Image – This is a great way to have 2 images in one module. This allows some neat mix blend modes, or you can have an image display then change out with another image using the Opacity settings.

Text
- Title text – The Image Intense text sections are comprised of three (3) parts – Title 1, Title 2 and Overlay. Title 1 and Title 2 are put together to create a “header text” for your Image Intense. Normally (but not always), the Title 2 part has a bolder text, depending on the Hover Style you select. In basic cases, you’ll want to limit each title text to one or two words, however, you can develop any header text or style you want. Title text can be styled in almost any way.
- Caption text – The Caption Text is the smaller text that sometimes appears when you hover over your Image Intense module. Other times it might already be there. Still other times it might move when you hover over the module. It all depends on which hover style effect you choose. As with the Title Text, the Caption Text can be styled in almost any way.
- Text formatting and links – Title or Caption text can be styled with basic HTML formatting tags for finer control of emphasis (italics) and strength (bold) within the text. You can also add line breaks, and turn selected text into a normal hypertext link using a built-in Image Intense pseudo-shortcode.
Buttons
- Button basics – Choose to include a button, and you’ll immediately have a Divi-style button added on top of your Image Intense module.
- Button styling – Use the Advanced Design Settings tab to style your button nearly any way possible, just like the Button module.
- Button position – Forget about using custom CSS to try place your button where you want it! Buttons in Image Intense can be placed in any of 9 positions within your module – from top left to bottom right. Kind of like tic-tac-toe, Hollywood Squares and the Brady Bunch.
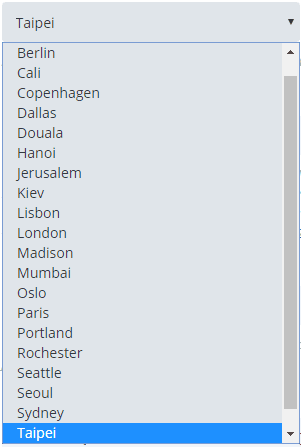
Intense Hover Style
There are 33 different hover style effects. Each named for a city and with its own set of strengths and weaknesses when it comes to how well it works with different configurations of text, buttons, backgrounds, etc. If you want to use a particular one but it’s not working quite right for you, you can easily customize the CSS for it within your child stylesheet or in Theme Options. You can see examples of all of them right here. Learn more about styling Image Intense with this tutorial.
Tilt Styles
To enable the tilt features, just select Tilt in the hover styles. A second drop down will become available to select from the 7 styles.
Overlay and border tilts effects are available for some of the options. Styles for both can be controlled under Design-> Overlay.
Some tilt effects use overflow. Visual builder isn’t capable of showing the overflow effects. They will show up on the front end though. Cape Cod especially uses this overflow, and in many cases, it’s recommended to add some extra padding to give it some space.
Borders
Titles and caption
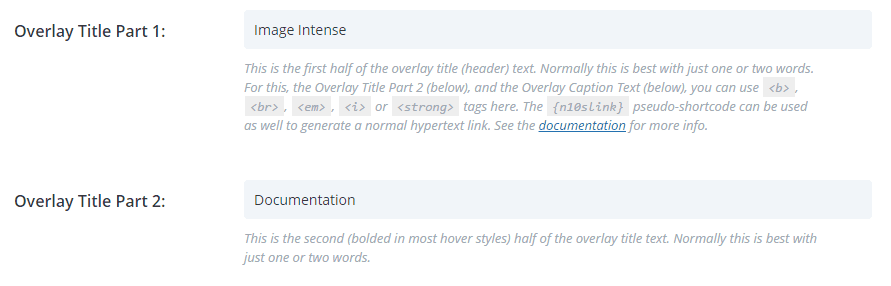
Image Intense Overlay Title 1 & 2 options
Text Alignment
Image Opacities
Image Opacity determines how “transparent” the image is when you are not hovering. The lower the opacity, the more that any background color or background image will show through.
The same applies to Image Opacity on Hover. This setting applies to the same image when you mouse over (“hover”) or long press (touch screens) on the module.
An example of this is at the very top of this page. We have an image specified in the “Image URL” setting in the “General Settings” tab, then we specify a Background Image in the “Advanced Design Settings” tab. In that tab, we also set the “Image Opacity” to 1.0 and the “Image Opacity on Hover” to 0. That way, when we are looking at the image it shows up completely. However, when we hover over (mouse) or long press (touchscreen) the module, the main image disappears completely and the background image shows up. That’s what we might call a “reveal on hover”.
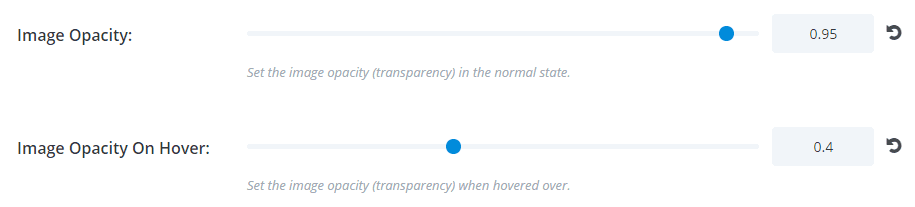
Image Intense opacities
Button Position
We sectioned off the Image Intense module into a 3×3 grid for button position. That means you have 9 different places you can put your button, from top left to bottom right. Note that “center” is horizontal (left to right) and “middle” is vertical (top to bottom).
To see how “Button Position” works, you’ll see several different Image Intense modules on this page that show different button positions.
This setting is in the “Advanced Design Settings” tab. Obviously, you must set “Include a Button” on the “General Settings” tab to “Yes” in order for this option to appear. This is where you’ll find it:
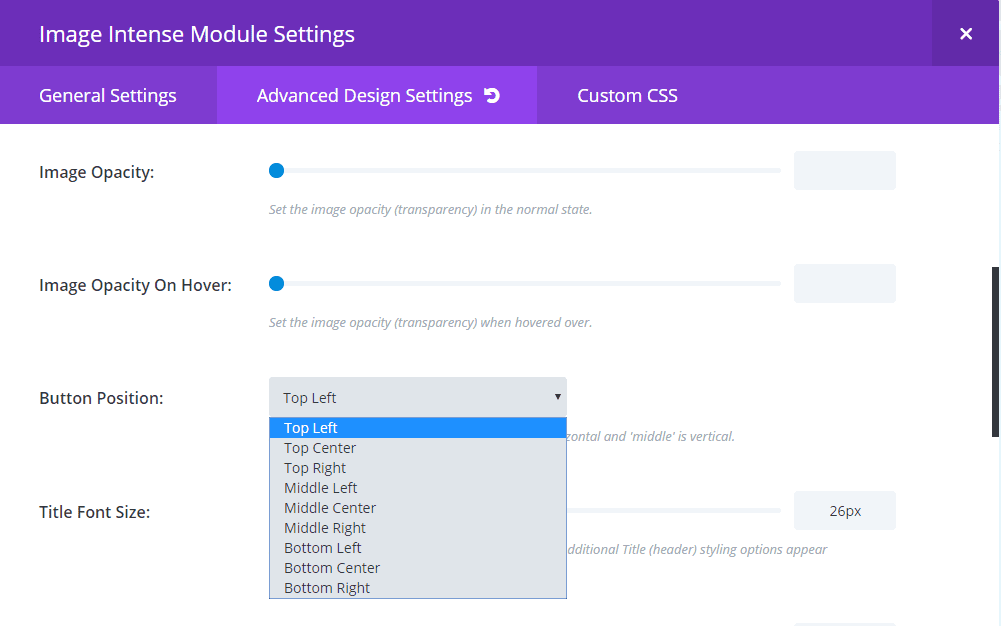
Image Intense Button Position

image intense faqs
After going through the documentation, you might still have a question. Here is a list of the more common troubleshooting questions we get asked about Image Intense.
Again, if you have any problems afterwards, be sure to shoot us a support ticket or let us know in the comments section below.
If your question seems to be a common one, we’ll add it to the list below!
Is it safe to upgrade to Image Intense 5.1?
How do I get updates?
If we release an update announcement and you do not see an update notice in your dashboard, click the “Check for updates” link for Image Intense within your plugins listing page.
Some of my options have disappeared!
- Get rid of options that weren’t necessary
- Move options into more appropriate sections (mostly moving things into the design tab)
The search bar at the top is your best bet if you’re having trouble locating something. If you still can’t, don’t be afraid to reach out to our support team and we’ll be happy to help you!
My padding/borders/margins aren't working right!
How do I get support?
If you’d like to see a new feature added, you can use the support ticket system as well. Or, you can join our favorite Facebook group and start a discussion.
I found something wrong with (or missing in) the documention!
Better yet, leave us a comment below so you’ll get all the credit.
For More Information
If you have any further questions about Image Intense that aren’t answered above, go ahead and check out the Superfly knowledgebase. You might even find out something you never thought of!